22 February 2018
seo, side-project
This post chronicles my ongoing attempt at getting one of my spammy website to rank in Google search result.
Background and Motivation
In 2008-2010, I was interested in SEO, particularly Black Hat SEO. I was trying to get my Squidoo page with a link to an affiliate product site to rank highly in Google. It went to the second page but I didn’t manage to make money from it. Fast-forward to today, I’m interviewing for a role that requires some Black Hat SEO knowledge, so here I am, researching and experimenting on what has changed in the field (not much!) and what works.
Game Plan
Note: I don’t have the time, patience or motivation to implement the 3-tiers link chain strategy so I’m going with a simple spammy backlink approachs.
- Select Thai keyword that has low to medium competition
- [White Hat SEO] Create a website with keyword in the domain name
- [Black Hat SEO] Fill the website with (free!) content using Google Translate
- [White Hat SEO] Site optimization and submission
- [Black Hat SEO] Backlink creations via spam blog and social profiles
Execution #1: Select Thai keyword that has low to medium competition
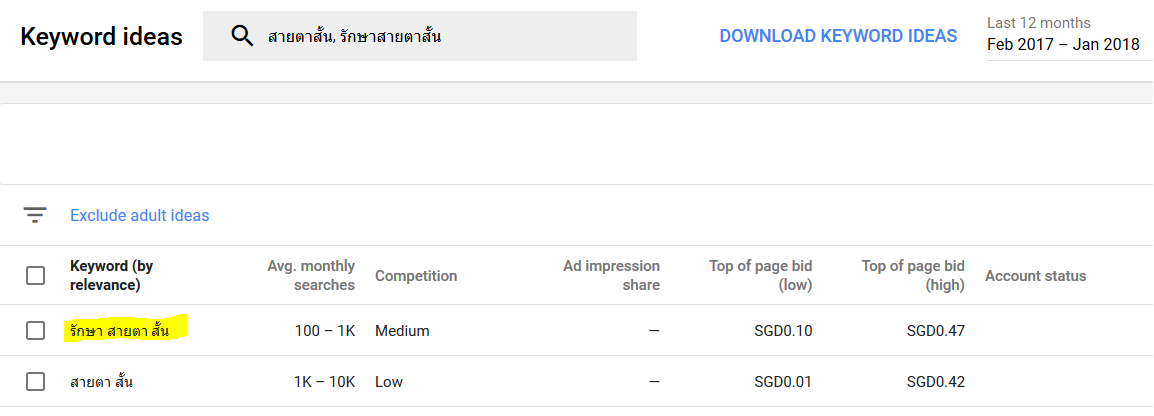
I went with Thai keyword as the competition for short keywords is still relatively low. With my lack of imagination, I decided to go for topic related to eyesight. The actual keyword I’m targeting is “รักษาสายตาสั้น” which means “myopia cure”. From Google Keyword Planner, that keyword has a medium competition. I don’t intend to sell any shady ebook or supplement that claims to improve eyesight but it would be cool if I could just get my website to rank.
Cost: $0
Google Keyword Planner
Execution #2: [White Hat SEO] Create a website with keyword in the domain name
A well-known SEO technique is to use a domain name that contains the keyword you want to rank for. I’ve read that this doesn’t really work anymore but I’m doing it anyway just because.
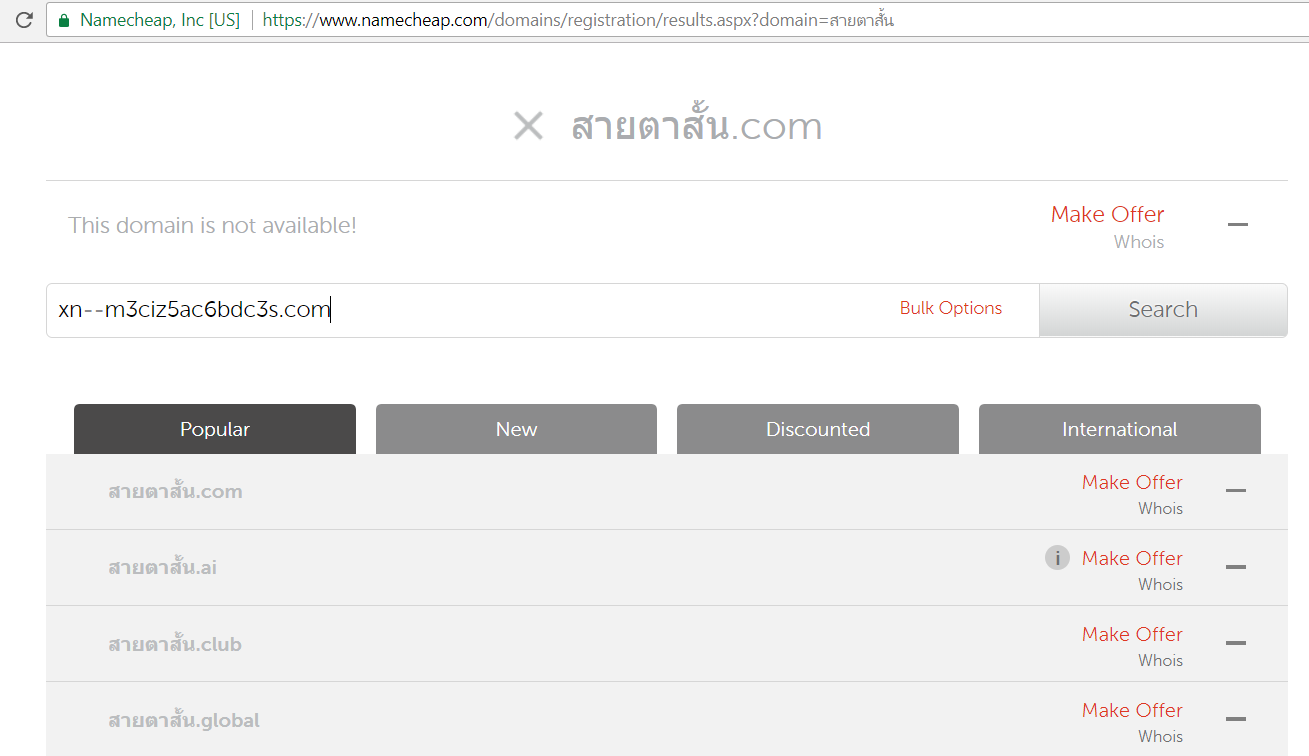
The domain name that I originally had in mind was “สายตาสั้น” which literally translates to “short-vision” (myopia) in English. The .com version of that was taken so I had to settle with a substring of that word. I’m now a proud owner of “สายตา.com” (vision.com).
Google doesn’t prefer one top domain (.com vs .net) to another but I prefer .com anyway. I also avoid country-code top-level domains as Google may wrongly geo-target the website. Eg .ly domain may be geo-targeted to Libya.
Cost: $11
Namecheap Domain Search
Execution #3: [Black Hat SEO] Fill the website with (free!) content using Google Translate
A good website needs to be filled with unique content. For English websites, there are Black Hat techniques like article spinnings or paying people to write filler article at minimal cost. Fortunately for spammy Thai websites, Google Translate comes to the rescue. I ripped off 4 articles from an English site and used it as an article on my site. I did that manually although this process can be easily automated.
Cost: $0
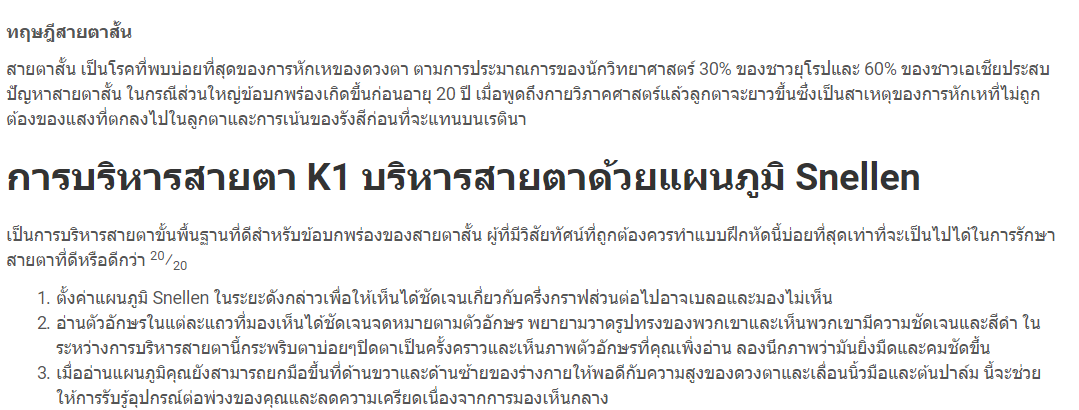
Translated content is really not bad! I can barely tell that it's translated by Google Translated.
Execution #4: [White Hat SEO] Site optimization and submission
1) Make the website responsive (mobile-friendly)
I chose Hugo’s Universal to be my theme of choice as it’s responsive and it looks pretty good.
Source: https://support.google.com/adsense/answer/6196932?hl=en

Responsive Design
2) Put the keywords in meta and title tag
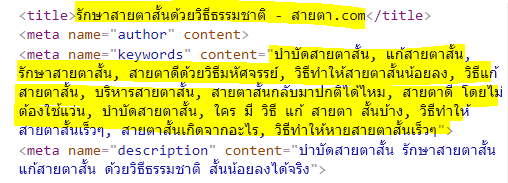
Title and Meta Tags contain keywords
3) Generate sitemap and submit it to Google via Seach Console for indexing
Hugo autogenerates sitemap.xml so I was able to submit that in the Google Search Console for indexing.
Source: https://support.google.com/webmasters/answer/6259634?hl=en

Search Console. Unfortunately only 2 of the pages have been indexed so far.
4) Enable https
I auto-deploy the website’s content using Netlify (yay for Continuous Delivery mode) and Netlify gives an option to enforce https for free using Let’s Encrypt.
Source: https://webmasters.googleblog.com/2014/08/https-as-ranking-signal.html
Execution #5: [Black Hat SEO] Backlink creations via spam blog and social profiles
// To be continued. But the gist is Fiverr.com and me wondering how to get those spammy links indexed.
I made the English-Thai Dictionary Chrome extension for my mom back in 2013. Back then, I just learned Django so I decided to put it to practice. I hosted the backend API application (Django + MySQL) in a Digital Ocean $5/month droplet and discontinued it in 2015 after learning that my droplet was compromised. In an effort to revamp my old projects, I looked into finding an easier and cheaper way to host the API. This blog post documents the journey and some of the surprising findings along the way of the migration.
1. How the English-Thai Chrome Extension Works
The Chrome extension displays Thai definitions of the english word double-clicked by the user.
Display Thai Definition of Double-Clicked English Word
Upon detection of double-click word highlight, the Chrome extension would make a request to the API passing in the English word as a path variable. For example, when a user double-click on the word "hello", the Chrome extension would make an AJAX call to www.somebaseurl.com/lookupEnglishThai/hello
The server would then respond with a JSON containing a list of the Thai definitions like so:
{
  "found": true,
  "search_term": "hello",
  "closest_search_term": "hello",
  "definitions": [
    "สวัสดี (คำทักทาย)"
  ]
}
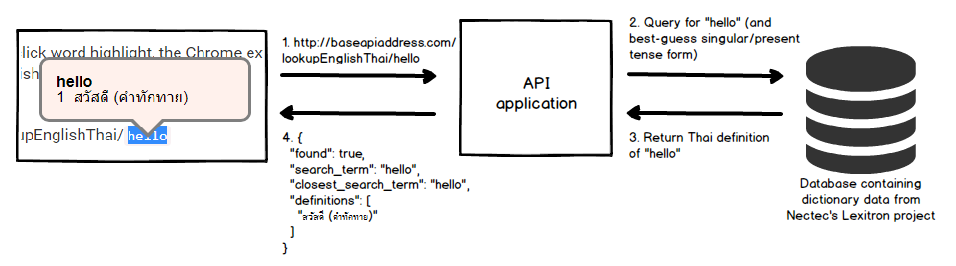
What happen when a user double clicks on the word 'hello'
2. Moving from MySQL to DynamoDB
The English-Thai dictionary data was taken from an XML file from the Lexitron project. My tasks were broken down as followed:
Create a new table in DynamoDB that I can use to efficiently lookup word definition
Parse and load data from the XML file to the DynamoDB table
2.1 New Table in DynamoDB
For reference, the XML representation of an English-Thai pair in the Lexitron's XML file is in this format.
<entry>
    <esearch>prize</esearch>
    <eentry>prize1</eentry>
    <tentry>ของมีค่า</tentry>
    <ecat>N</ecat>
    <ethai>ชั้นยอด, ดีพอที่จะได้รับรางวัล</ethai>
    <id>52005</id>
</entry>
MySQL Schema
The MySQL schema used is a 1 to 1 mapping of each "entry" in the XML.
| Field |
Type |
Sample Value |
| id |
integer |
52005 |
| esearch |
varchar(128) |
prize |
| eentry |
varchar(128) |
prize1 |
| tentry |
varchar(1028) |
ของมีค่า |
| tcat |
varchar(10) |
N |
DynamoDB Table
DynamoDB is schemaless but it needs to have a primary partition key.
I've chosen english_word to be the primary partition key as that's used to query the database.
The table is also populated with an additional attribute called thai_definitions with the data type String Set.
| Attribute |
Type |
Sample Value |
| english_word |
string |
prize |
| thai_definitions |
string set |
{ "การจับกุม", "ของมีค่า", "ตีราคาสูง", "ที่ได้รับรางวัล", "ยอดเยี่ยม", "รางวัล", "สิ่งของที่ยึดได้" } |
2.2 Parse and load 53,000 items into DynamoDB table
I used boto3's batch_writer to batch up the put_item request and quickly noticed that that the speed of inserting an item into DynamoDB was
really slow after about 200 requests.
After some investigation, I discovered that my Write Capacity Unit (WCU) setting for the table was 1 per second and hundreds of requests were being throttled.
After increasing WCU to 600, the number of throttled requests decreased and I could see from the log that the put_item requests were completed more quickly.
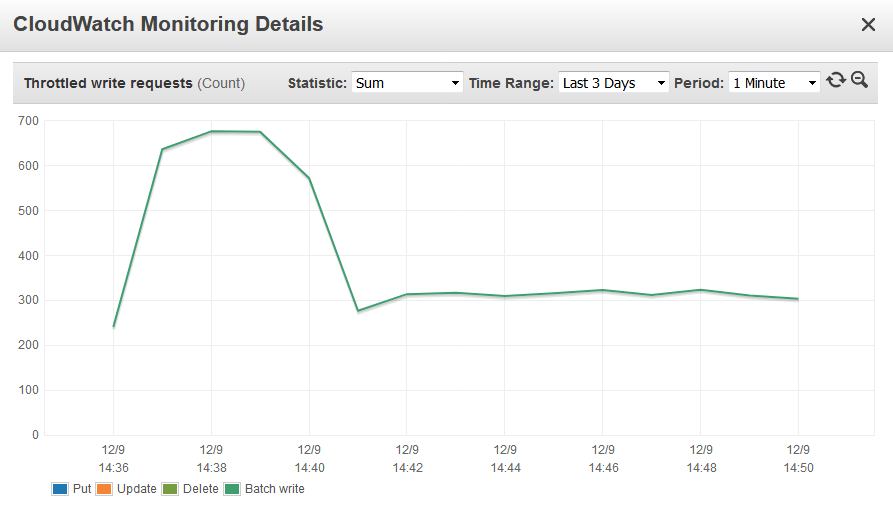
Throttled requests metric showing hundreds of throttled writes
3. Moving from Django to AWS Lambda
It was easy switching from Django to AWS Lambda because I literally had 1 just API endpoint. The logic in guessing the "closest" search term (in case the user lookup a word which is in past-tense eg. "liked", "married" or plural form of the word eg. "guests", "ferries") remains the same.
With Django, I had about 7 different files. With AWS Lambda, the number of files reduced to just 2: 1 for lambda handler, 1 for unit test.
I chose the microservice-http-endpoint-python3 blueprint as the starting point for my function because it covers my basic use case of setting up a RESTful API endpoint that reads from DynamoDB.
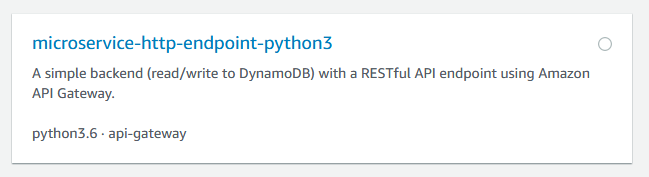
microservice-http-endpoint-python3 blueprint
The tricky part came when I was setting up API Gateway as a trigger for my function. I want the user's search term to be a part of the url path /lookupEnglishThai/hello instead of a part of the query string /lookupEnglishThai?search_term=hello
It was not so obvious from the documentation how to configure a path parameter, but after clicking around, I figured out that it can be achieved by creating a child resource, with {path_parameter_here} syntax as per the screenshot below.
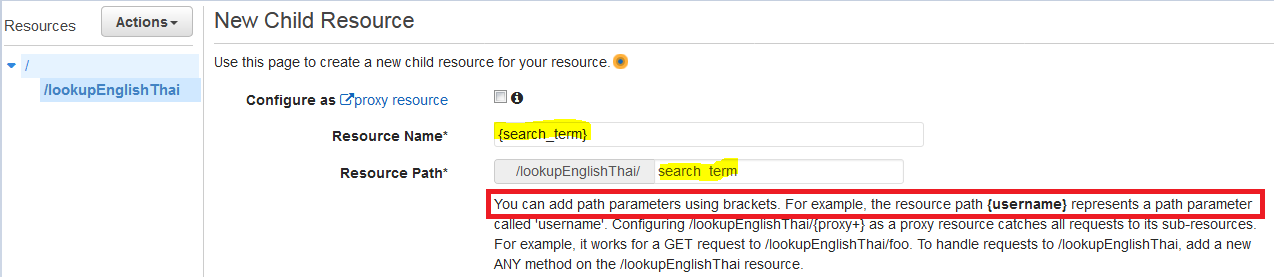
Creating resource with path paramter called 'search_term'
4. Closing Thoughts
The setup works pretty well and I'm happy with the performance. I don't have the stats of the old API call but with the new API, the total time taken by the browser is about 330ms, half of which is DNS lookup. I'm making that HTTP request from Singapore and the AWS server is in Singapore. The latency shouldn't be noticeably different for users in Thailand.
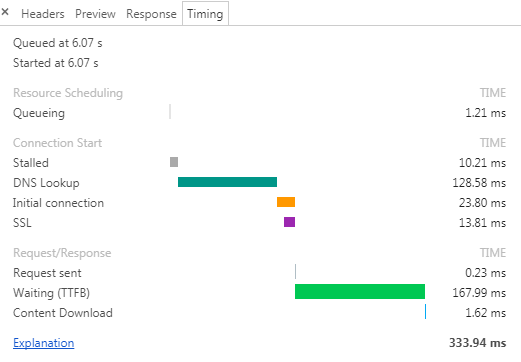
Network Response Timing
I didn't know a thing about how to design a table structure in NoSQL database prior to this but watching AWS DynamoDB Deep Dive from Pluralsight helped ease my fear a little. I had a lot of fun and I'm really glad I finally fixed the API endpoint. There are three other old projects left that I want to do a spring cleaning on and they're coming up in a bit!
You can find the source code of this project on Github: https://github.com/veeraya/lexitronapi
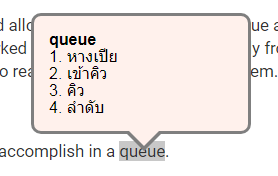
Last weekend I set out to create an app that would allow me to create a reading queue and nag at me daily to action on the top entry until I’ve marked it as read. This stems primarily from my tendency to have a loooong list of articles I want to read but never getting to read them.
1. The Goals
The ability to add and remove task I want to accomplish in a queue.
Scheduled notification which sends me the top task from the queue daily.
I should be able to easily mark the task as “done” (i.e. mark the article as “read”) and it should drop off the queue.
2. The Architecture
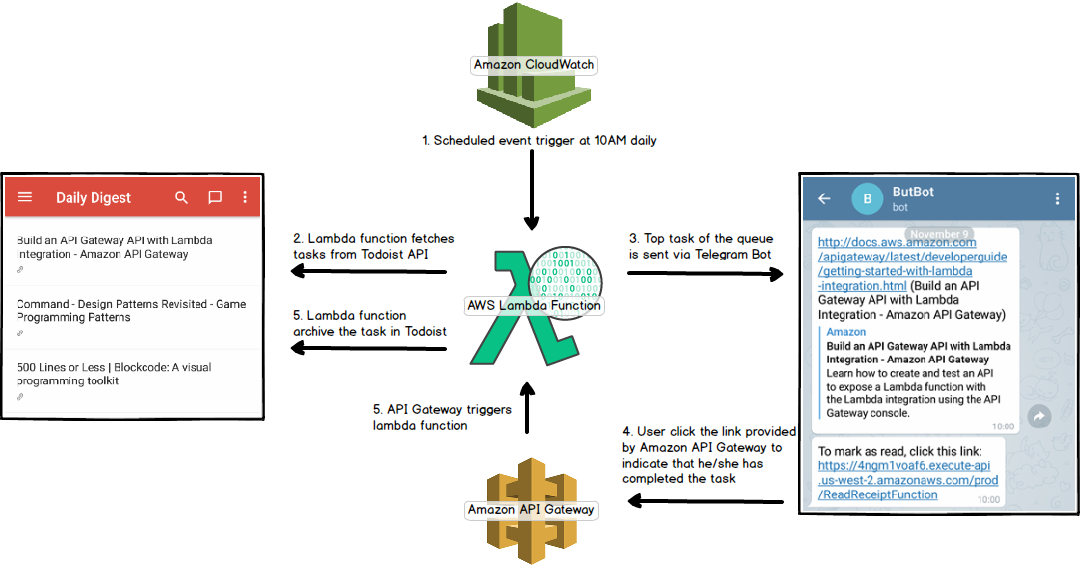
How it works
3. The Process
3.1 CRUD for my reading list
I spent quite some time trying to implement simple CRUD of reading task list but it was boring as hell so I switched to using Todoist as the “datastore” for my reading list. I had been using Todoist on Android for the past few months and I was pleasantly surprised to find out that it provides dead-simple APIs.

Screenshot of Todoist app in my phone.
3.2 Building Lambda Function and Setting Up Scheduled Event
Spinning up an EC2 instance just to run Cron jobs seems a lot like an overkill for this very simple task. All I want is a daily job that calls Todoist API to fetch the content of the daily task I’ve queued, and call another API to send me the task of the day. AWS Lambda seems to fit the bill since I can just upload my function and makes it runs upon scheduled CloudWatch Events which acts as a trigger.
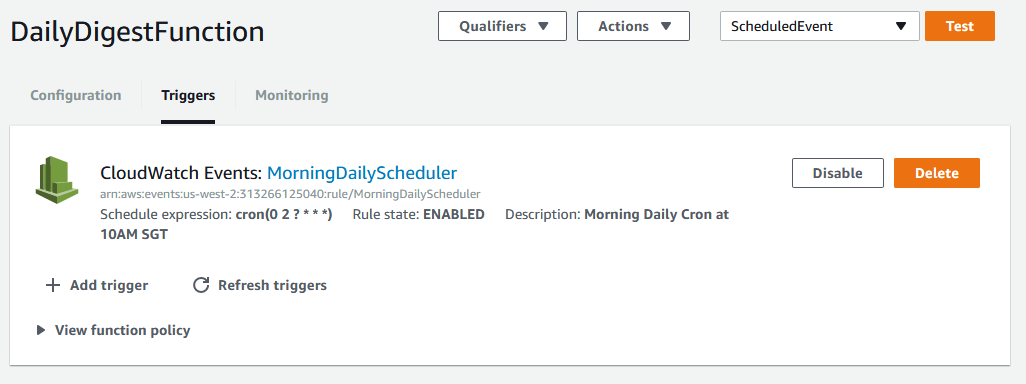
Screenshot of the CloudWatch Event used as the trigger for my lambda function.
3.3 Setting up Telegram Bot to notify me of the task of the day
Telegram’s Bot creation is real simple. I chatted with BotFather and my bot was created within seconds. You’d get an API access token once the bot is created.
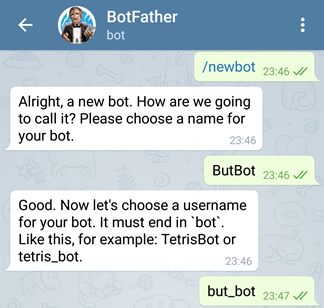
Screenshot of the Telegram bot creation process.
3.4 Creating an API using Amazon API Gateway and Lambda function to mark the task as done
Amazon API gateway let you easily create a REST API to expose your lambda function to a HTTP call. I wrote another lambda function for moving the task out of the queue to an archive folder in Todoist and configured the API Gateway such that a user can click the link to mark it as done.
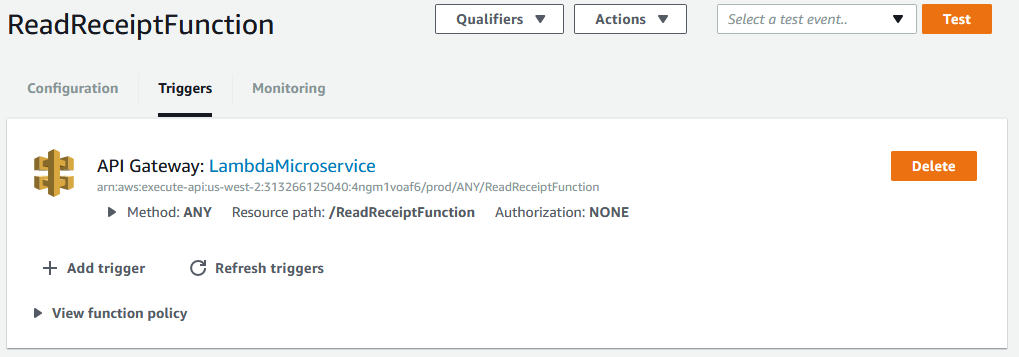
Lambda function with a API gateway as the trigger.
4. The End Product
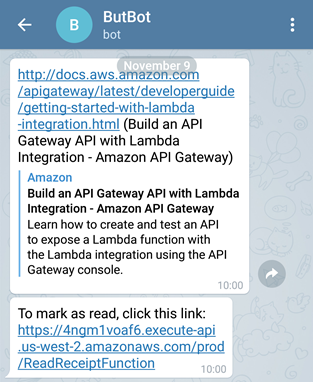
What I received everyday at 10AM
5. Closing Thoughts
I’ve got this task (article-of-the-day) notifier running for a week and so far I’ve read 4 articles from the reading queue. That’s a big improvement.
On the technical sides, now that I get the hang of the lambda function, I find it to be incredibly useful and easy to set up. I have configured another lambda function to ping my free heroku instance so it won’t sleep after 30 minutes of inactivity. I’m planning to put the code for this project on Github once I clean it up.
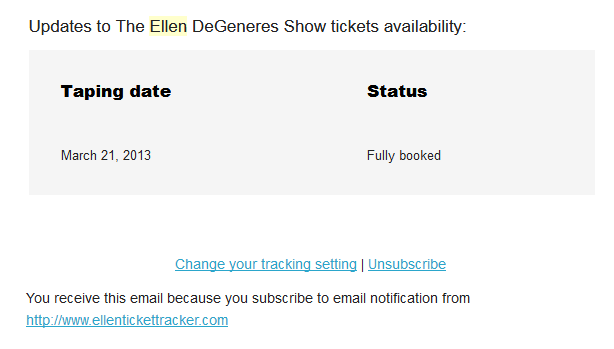
It’s here! It’s here! The one and only the Ellen DeGeneres Show ticket tracker.
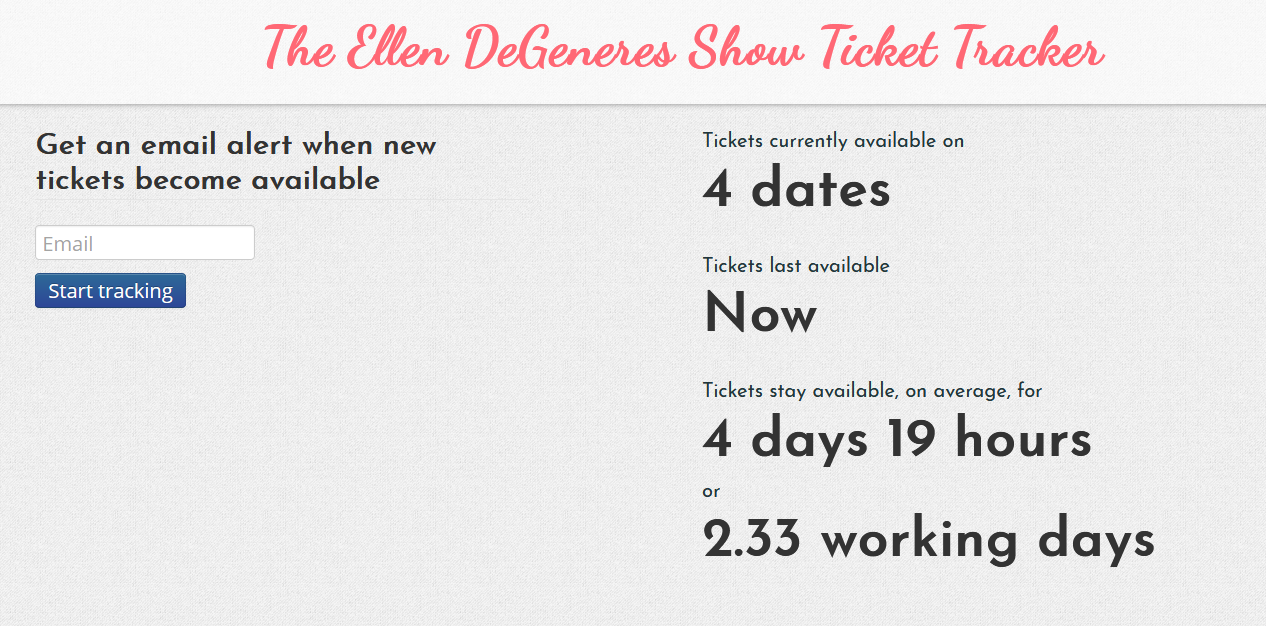
I started this project a few days before final exam. I had been checking Ellen’s ticket page almost every other hour till I realized that it was time to make a script do it for me. The idea is simple - check that page every 10 minutes and send me an email when new tickets become available.
Throughout this winter break, I continue adding more features and it has evolved from a simple script (rake task, to be exact) to a nearly-done web app that other people can use. If I find my own app super useful, there probably are other people who will use it right?
Choose ticket dates to track:

Email notification isn’t ugly too!
Built with Ruby on Rails, Twitter Bootstrap and a lot of love for Ellen.
Notable gems:
- Nokogiri - scrape http://ellentv.com/tickets
- Gon - pass rails variable to javascript
- Devise - admin authentication
- twitter-bootstrap-rails