English-Thai Dictionary Chrome Extension - the Migration from Django and MySQL to AWS Lambda and DynamoDB
10 December 2017 aws lambda, dynamodb, side-projectI made the English-Thai Dictionary Chrome extension for my mom back in 2013. Back then, I just learned Django so I decided to put it to practice. I hosted the backend API application (Django + MySQL) in a Digital Ocean $5/month droplet and discontinued it in 2015 after learning that my droplet was compromised. In an effort to revamp my old projects, I looked into finding an easier and cheaper way to host the API. This blog post documents the journey and some of the surprising findings along the way of the migration.
1. How the English-Thai Chrome Extension Works
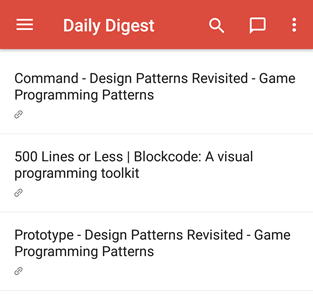
The Chrome extension displays Thai definitions of the english word double-clicked by the user.
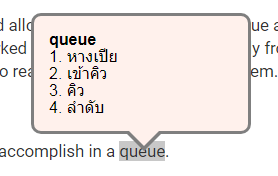
Display Thai Definition of Double-Clicked English Word
Upon detection of double-click word highlight, the Chrome extension would make a request to the API passing in the English word as a path variable. For example, when a user double-click on the word "hello", the Chrome extension would make an AJAX call to www.somebaseurl.com/lookupEnglishThai/hello
The server would then respond with a JSON containing a list of the Thai definitions like so:
{
  "found": true,
  "search_term": "hello",
  "closest_search_term": "hello",
  "definitions": [
    "สวัสดี (คำทักทาย)"
  ]
}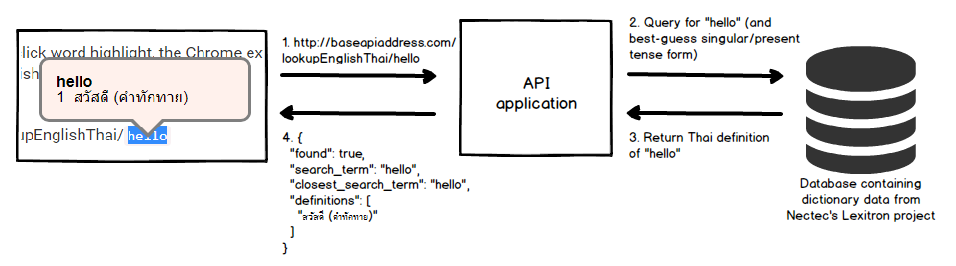
What happen when a user double clicks on the word 'hello'
2. Moving from MySQL to DynamoDB
The English-Thai dictionary data was taken from an XML file from the Lexitron project. My tasks were broken down as followed:
Create a new table in DynamoDB that I can use to efficiently lookup word definition
Parse and load data from the XML file to the DynamoDB table
2.1 New Table in DynamoDB
For reference, the XML representation of an English-Thai pair in the Lexitron's XML file is in this format.
<entry>
    <esearch>prize</esearch>
    <eentry>prize1</eentry>
    <tentry>ของมีค่า</tentry>
    <ecat>N</ecat>
    <ethai>ชั้นยอด, ดีพอที่จะได้รับรางวัล</ethai>
    <id>52005</id>
</entry>
MySQL Schema
The MySQL schema used is a 1 to 1 mapping of each "entry" in the XML.
| Field | Type | Sample Value |
|---|---|---|
| id | integer | 52005 |
| esearch | varchar(128) | prize |
| eentry | varchar(128) | prize1 |
| tentry | varchar(1028) | ของมีค่า |
| tcat | varchar(10) | N |
DynamoDB Table
DynamoDB is schemaless but it needs to have a primary partition key.
I've chosen english_word to be the primary partition key as that's used to query the database.
The table is also populated with an additional attribute called thai_definitions with the data type String Set.
| Attribute | Type | Sample Value |
|---|---|---|
| english_word | string | prize |
| thai_definitions | string set | { "การจับกุม", "ของมีค่า", "ตีราคาสูง", "ที่ได้รับรางวัล", "ยอดเยี่ยม", "รางวัล", "สิ่งของที่ยึดได้" } |
2.2 Parse and load 53,000 items into DynamoDB table
I used boto3's batch_writer to batch up the put_item request and quickly noticed that that the speed of inserting an item into DynamoDB was
really slow after about 200 requests.
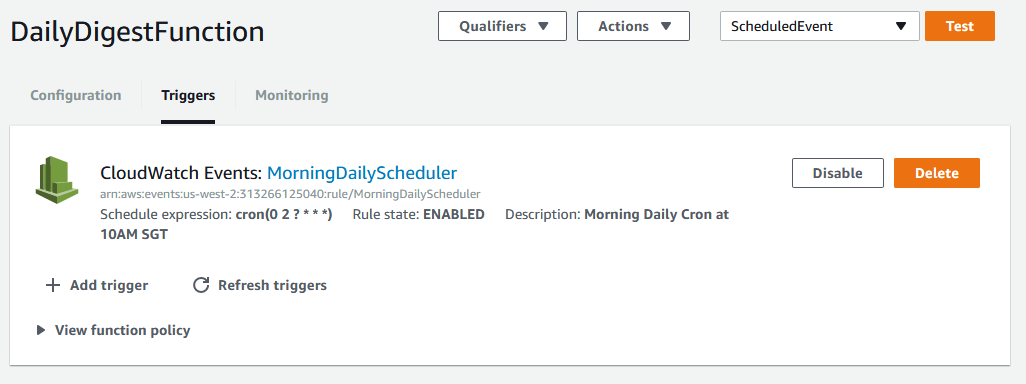
After some investigation, I discovered that my Write Capacity Unit (WCU) setting for the table was 1 per second and hundreds of requests were being throttled.
After increasing WCU to 600, the number of throttled requests decreased and I could see from the log that the put_item requests were completed more quickly.
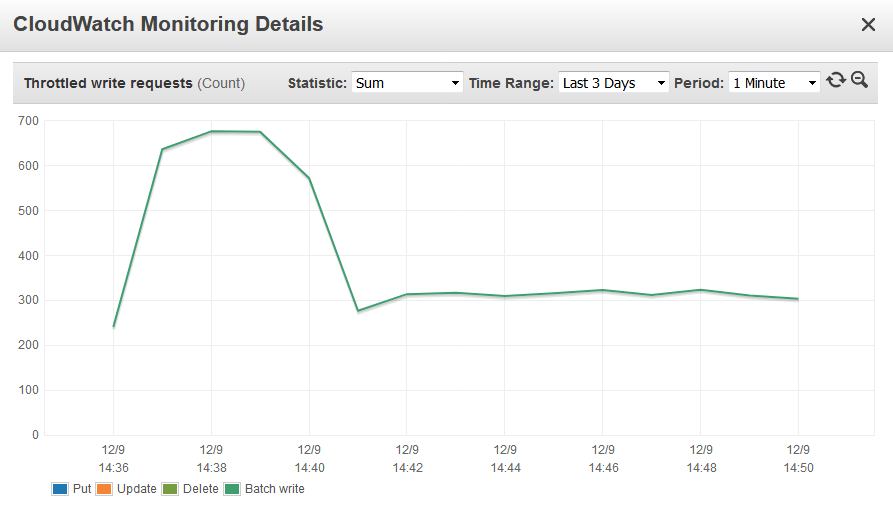
Throttled requests metric showing hundreds of throttled writes
3. Moving from Django to AWS Lambda
It was easy switching from Django to AWS Lambda because I literally had 1 just API endpoint. The logic in guessing the "closest" search term (in case the user lookup a word which is in past-tense eg. "liked", "married" or plural form of the word eg. "guests", "ferries") remains the same. With Django, I had about 7 different files. With AWS Lambda, the number of files reduced to just 2: 1 for lambda handler, 1 for unit test.
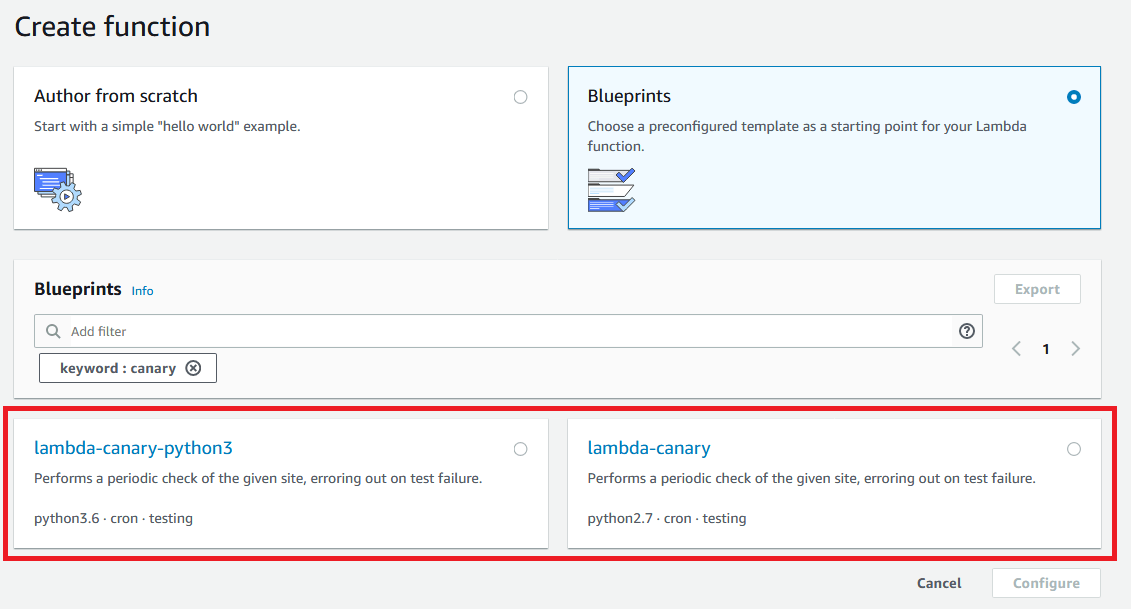
I chose the microservice-http-endpoint-python3 blueprint as the starting point for my function because it covers my basic use case of setting up a RESTful API endpoint that reads from DynamoDB.
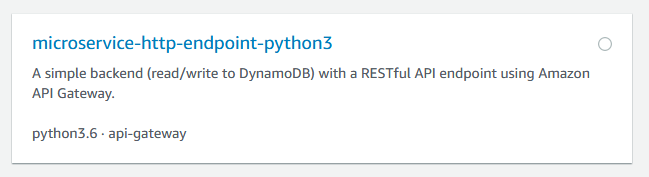
microservice-http-endpoint-python3 blueprint
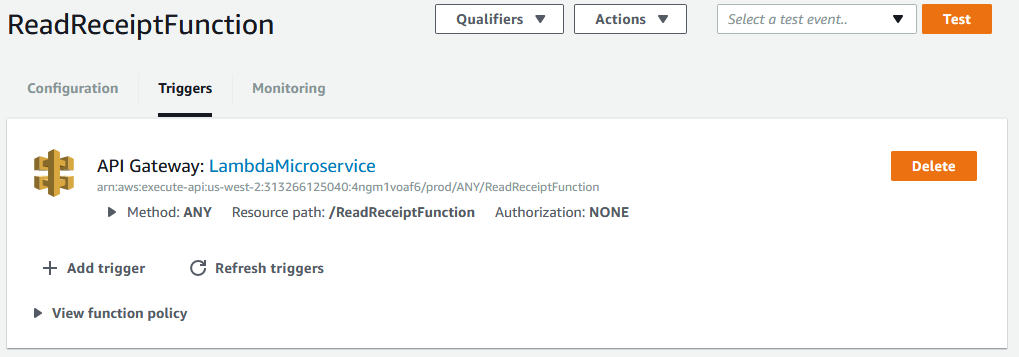
The tricky part came when I was setting up API Gateway as a trigger for my function. I want the user's search term to be a part of the url path /lookupEnglishThai/hello instead of a part of the query string /lookupEnglishThai?search_term=hello
It was not so obvious from the documentation how to configure a path parameter, but after clicking around, I figured out that it can be achieved by creating a child resource, with {path_parameter_here} syntax as per the screenshot below.
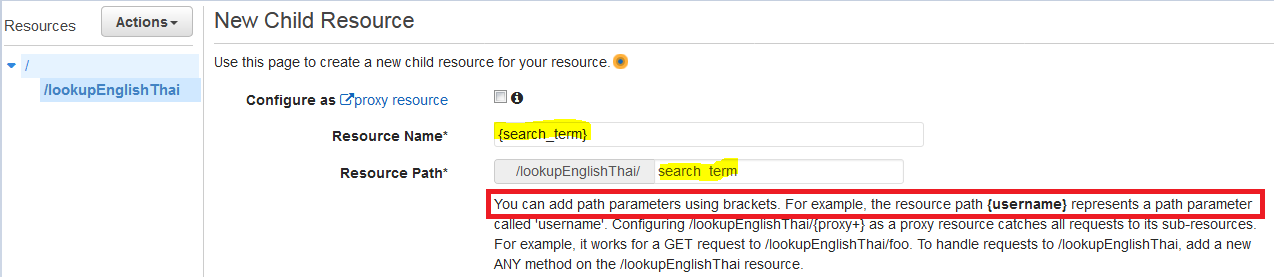
Creating resource with path paramter called 'search_term'
4. Closing Thoughts
The setup works pretty well and I'm happy with the performance. I don't have the stats of the old API call but with the new API, the total time taken by the browser is about 330ms, half of which is DNS lookup. I'm making that HTTP request from Singapore and the AWS server is in Singapore. The latency shouldn't be noticeably different for users in Thailand.
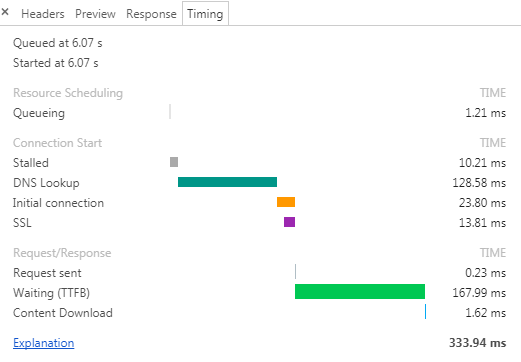
Network Response Timing
I didn't know a thing about how to design a table structure in NoSQL database prior to this but watching AWS DynamoDB Deep Dive from Pluralsight helped ease my fear a little. I had a lot of fun and I'm really glad I finally fixed the API endpoint. There are three other old projects left that I want to do a spring cleaning on and they're coming up in a bit!
You can find the source code of this project on Github: https://github.com/veeraya/lexitronapi